參考文獻:
本文參考以下文章與課程
- Docker Mastery: with Kubernetes +Swarm from a Docker Captain 第四節課
- [Docker] Bridge Network 簡介
- Gitbook - 《Docker —— 從入門到實踐》正體中文版 by Philipzheng
- gunjank \ docker-nginx-scratch
- Ubuntu下安装Nginx
-20240222140014279.png)
使用前記得先啟用docker
linux
systemctl start docker
mac 要先啟動 docker Desktop才能使用
接著 可以看 dover version
docker version
更多的server info
docker info
Docker 兩種command
輸入 docker就可以看到大部分的command
有兩種
- 一般Command ex:
docker run - Management Command + sub Command組合 ex:
docker container run
這是因為command 太多所以收在Management Command 裏面
Common Commands:
  run         Create and run a new container from an image
  exec        Execute a command in a running container
  ps          List containers
  build       Build an image from a Dockerfile
  pull        Download an image from a registry
  push        Upload an image to a registry
  images      List images
  login       Log in to a registry
  logout      Log out from a registry
  search      Search Docker Hub for images
  version     Show the Docker version information
  info        Display system-wide information

Management Commands:
  builder     Manage builds
  buildx     Docker Buildx (Docker Inc., v0.12.1-desktop.4)
  compose    Docker Compose (Docker Inc., v2.24.5-desktop.1)
  container   Manage containers
  context     Manage contexts
  ...下面還有
2. starting a nginx web server
docker tool ip 192.168.99.100
2-1 docker container run
docker container run --publish 3000:80 nginx
--publish 就是 -p, 3000:80左邊是外面連進docker用的port,右邊是docker裏面自己用的port (如果左邊開 80 port 可以直接用localhost連接)
可以看到下面結果
ctrl-c可以把它關掉
也可以多加
-dor--detach讓跳出terminal之後還可以用
docker container run --publish 3000:80 -d nginx
以上指令執行
- 從hub 下載image
- start container
- 開啟外部3000 port 並對到內部80 port
- 另外要注意每次呼叫會產生一個新的container而不是啟用舊的container ![[Docker/Data base 資料.md_Attachments/截圖 2024-02-21 上午10.14.50.png]]
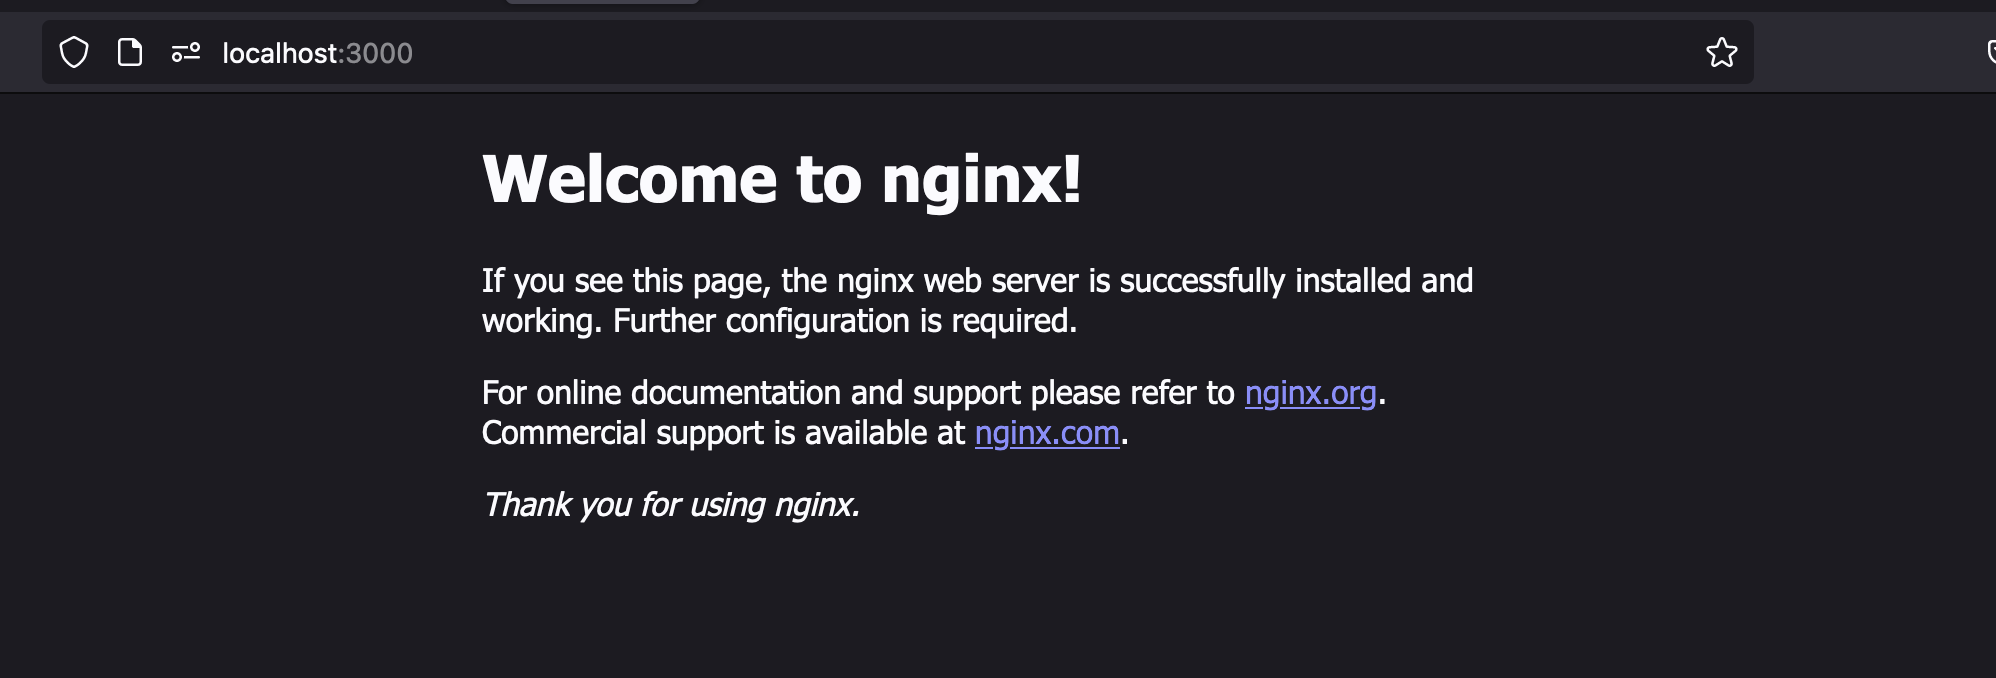
進入 localhost:3000就能看到nginx
使用
--name來幫container命名,不然會自動給名稱
記得 nginx要放最後面
docker container run -d --name myNginx nginx
Check container
ls 可以看到所有正在跑的container
docker container ls

用container最前面的幾個字母可以stop,再跑一次docker container ls就會沒有東西
docker stop 97a
但沒在跑不代表container不見了
ls -a 可以看到所有container,包含沒有在跑的container
docker container ls -a

他可以對應到desktop的版本

docker container rm 可以刪除container
docker container rm {container Id / name}

如果container 還在運行,rm -f 強制刪除
docker container rm {container Id / name} -f

docker container --help看所有可以用的指令
tinymurky@CAFECAde-MBP ~ docker container --help
Usage: docker container COMMAND
Manage containers
Commands:
attach Attach local standard input, output, and error streams to a running container
commit Create a new image from a container's changes
... 下面還有很多
docker container top {Container 名稱/ID前幾個字} 可以看 container裡面的process

2-1-1 docker container run背後做了什麼
docker container run背後邏輯如下
- 找尋local的image
- local沒有image,前往hub尋找(Default: Docker hub)
- 下載指定版本的image,沒有就載latest
- 用image生成新的container
- 提供container 虛擬ip在docker engine的私有網路裡
- 把外部的port(ex 3000) 對到container 內部使用的port (ex: 80)
- 使用image 內的
DockerfileCMD 啟動 container ex:
docker container run -d --publish 3000:80 --name myNginx nginx:1.11
--publish 3000:80:這部分是將容器内的80端口映射到宿主機器的3000端口。--name myNginx:這部分指定了容器的名稱為myNginx。nginx:1.11:這部分指定了要使用的 Nginx image版本,即使用 Nginx 1.11 版本。
2-2 docker 不是vm, 只是process
起一個mongo
docker container run --name mongo -d mongo
docker ps也可以看是否啟動
docker ps

docker top 可以看container 內部正在執行的process

ps aux 可以看所有正在running 的process
備註:windows, apple 看不到以下畫面,因為docker是用mini VM執行,可參考以下網址
- Windows : Getting a Shell in the Docker for Windows Moby VM
- [Mac: # Docker Desktop for Mac Commands for Getting Into The Local Docker VM]
先安裝以下
docker run -it --rm --privileged --pid=host justincormack/nsenter1
然後
ps aux

# 整不到的話可以用grep 來搜
ps aux | grep mongo
在mac 上面可以看到mongo 是 Linux VM 裡面的一個process
1014 999 0:19 mongod --bind_ip_all
如果是用linux系統可以直接看到 mongo 的process,我們可以知道docker container run的時候是直接是一個process 而不是vm
2-3 觀察container內部狀況
docker container top: process list in one containerdocker container inspect: details of one container configdocker container stats: performance stats for all containers
docker container top
可以看到 container裡面的 process

docker container inspect
會回傳一個json,裡面寫出這個container是如何啟動的設定值

docker container stats
可以看到 container 裡面的運行狀況
docker container stats c74

2-4 操作container 內部
docker container run -itdocker container exec -it
-i 和 -t是兩個不同的指令
輸入help可以看到:
docker container run --help
docker container run --help
Usage:  docker container run [OPTIONS] IMAGE [COMMAND] [ARG...]
  -i, --interactive                      Keep STDIN open even if not attached
      --ip string                        IPv4 address (e.g., 172.30.100.104)
      --ip6 string                       IPv6 address (e.g., 2001:db8::33)
      --ipc string                       IPC mode to use
      --isolation string                 Container isolation technology
      --kernel-memory bytes              Kernel memory limit```
  -t, --tty                              Allocate a pseudo-TTY
      --ulimit ulimit                    Ulimit options (default [])>
-i:讓session開著,可以獲得terminal input-t:ssh相關指令
run與start與exec的差別
docker container run -it: 開一個新的container並進入指令畫面docker container start -ai:啟動一個已存在的container之後進入containerdocker container exec -it: 進入正在運行的container()
run
最後面的bash會直接讓我們進入創造好的container的terminal,用exit來結束
docker container run -it --name myNginx nginx:latest bash
-20240222215107958.png)
exec
>docker container exec --help

Usage:  docker container exec [OPTIONS] CONTAINER COMMAND [ARG...]
Execute a command in a running container

Aliases:
  docker container exec, docker exec

Options:
  -d, --detach               Detached mode: run command in the background
      --detach-keys string   Override the key sequence for detaching a container
  -e, --env list             Set environment variables
      --env-file list        Read in a file of environment variables
  -i, --interactive          Keep STDIN open even if not attached
      --privileged           Give extended privileges to the command
  -t, --tty                  Allocate a pseudo-TTY
  -u, --user string          Username or UID (format: "<name|uid>[:<group|gid>]")
  -w, --workdir string       Working directory inside the container
離開都是使用 exit
-20240222215834989.png)
2-4-1備註:體積很小的linux沒有 bash
有一些體積很小的很適合用docker安裝
- alpine
# 下載image
docker pull alpine
由於alpine太小本身沒有bash,要自己用sh裝bash,啟動alpine後直接進入 sh
docker container run -it alpine sh
-20240222220309191.png)
apk update
apk upgrade
apk add bash
安裝好可以輸入bash進入了
2-5 docker network
- Docker 官網 Bridge network driver
- Docker Bridge Network 簡介
- Review
docker container run -p - check port using
docker container port <container>
2-5-1 docker network 預設值
- Docker 內部的container會接到一個私有虛擬網路(private virtual network),預設是
bridge,但可以自訂 - 每個虛擬網路會通過Network Address Translation (NAT)防火牆連到外部ip
- 就算不使用
-p指令(開port連到外部),只要連在同一個私有虛擬網路的container都可以相互溝通 - 最好的寫法是每個app都放在自己的一套network裡面,而app裡的東西不用expose給外界,ex:
- newtwork
my_web_app放mysql和php/apache - network
my_api放mongo和nodejs
- newtwork
docker container port {container name}可以查詢 container對外的port
2-5-2 範例
起一個nginx
docker container run -p 3000:80 --name myNginx -d nginx
container port檢查 內部->外部連線
docker container port myNginx

# 回傳
80/tcp -> 0.0.0.0:3000
用container inspect {container Name}看到包含container ip位置的json
不想全部看到的話可以用 --format 來只取出ip位置
可以看到ip位置是172開頭的
docker container inspect --format '{{ .NetworkSettings.IPAddress }}' myNginx

# 回傳
172.17.0.2
接著再起一個 postgreSQL
docker container run --name myPostgres -e POSTGRES_PASSWORD=password -d postgres
備註:pull之前最好用search看一下image有沒有輸入正確
docker search postgre
接著檢查 brridge network
docker network inspect bridge
可以從下面看到,bridge本身是 172.17.0.1, myNginx是 172.17.0.2,myPostgre是172.17.0.3
一般docker預設都是 172.17...
[
    {
        "Name": "bridge",
        "Id": "2313892629d28603e811aacb93d5dc062df4f010da88a8c318b1ee47c1ed84c8",
        "Created": "2024-02-25T02:29:00.578655007Z",
        "Scope": "local",
        "Driver": "bridge",
        "EnableIPv6": false,
        "IPAM": {
            "Driver": "default",
            "Options": null,
            "Config": [
                {
                    "Subnet": "172.17.0.0/16",
                    "Gateway": "172.17.0.1"
                }
            ]
        },
        ...去除多餘的
        "Containers": {
            "9d42ec29c4eca60492418c988cc7b6f8f916713738d261e9a1ca994b86b814e9": {
                "Name": "myPostgres",
                "EndpointID": "5b57f51c7c73c37e155967e9c9480c41e05c06e4cf7bf1fc233613d604348d7f",
                "MacAddress": "02:42:ac:11:00:03",
                "IPv4Address": "172.17.0.3/16",
                "IPv6Address": ""
            },
            "e61fd0287afebc5b93375fe39ec7ef649cef4a7868368f9e3acddc519d5d9534": {
                "Name": "myNginx",
                "EndpointID": "542c522e38224c4027411d4d184e2a7f99d716fdba159f5b8e824f3045861a41",
                "MacAddress": "02:42:ac:11:00:02",
                "IPv4Address": "172.17.0.2/16",
                "IPv6Address": ""
            }
        },
        ...去除多餘的
]
連結方式如下,外界的host 會先進入bridge,才會進入container,container,彼此之間可以用內部網路ip溝通,但不能使用domain name 如 myNginx溝通
-20240224195047332.png)
2-5-2 docker Network 指令
docker network ls: show networksdocker network inspect {network name}: inspect a networkdocker network create --driver: 新建network, --driver是optiondocker network connect: attach a network to containerdocker network disconnect: detach a network from container
docker network ls
使用以下指令看現在有什麼network
docker network ls
✘ tinymurky@tinymurky-home-mint ~ docker network ls
NETWORK ID NAME DRIVER SCOPE
2313892629d2 bridge bridge local
d65460053270 host host local
b9e00e464780 none null local
裡面會有三個:
bridge:就是default docker virtual network,bridge會通過 NAT防火牆連到host iphost:他是特別的網路,他跳過docker virtual network,將容器連接到主機port (-p指令)- 壞處:containerization(容器化)的security boundary沒有辦法保護container的port
- 好處:提高吞吐量
none:一個沒有連接到任何東西的interface,可以在上面new一個新的 network
docker network create --driver
--driver是驅動,不給的話就是預設driver bridge, 可以用第三方的如Weave
docker network create my_app_net
多一個networkmy_app_net,driver是bridge
tinymurky@tinymurky-home-mint ~ docker network ls
NETWORK ID NAME DRIVER SCOPE
2313892629d2 bridge bridge local
d65460053270 host host local
0220d7072c3c my_app_net bridge local
b9e00e464780 none null local
他還有很多其他的東西可以用
tinymurky@tinymurky-home-mint ~ docker network create --help
Usage: docker network create [OPTIONS] NETWORK
Create a network
Options:
--attachable Enable manual container attachment
--aux-address map Auxiliary IPv4 or IPv6 addresses used by Network driver (default map[])
--config-from string The network from which to copy the configuration
--config-only Create a configuration only network
-d, --driver string Driver to manage the Network (default "bridge")
--gateway strings IPv4 or IPv6 Gateway for the master subnet
--ingress Create swarm routing-mesh network
--internal Restrict external access to the network
--ip-range strings Allocate container ip from a sub-range
--ipam-driver string IP Address Management Driver (default "default")
--ipam-opt map Set IPAM driver specific options (default map[])
--ipv6 Enable IPv6 networking
--label list Set metadata on a network
-o, --opt map Set driver specific options (default map[])
--scope string Control the network's scope
--subnet strings Subnet in CIDR format that represents a network segment
接著新增一個nginx在剛剛的my_app_net
docker container run -d --name new_nginx --network my_app_net nginx
然後
docker network inspect my_app_net
可以看到 new_nginx 掛在裡面
[
    {
        "Name": "my_app_net",
        "Id": "0220d7072c3c4d7cdb352e473b2071efeb364bfd3736f68ea4a0be61ae70c625",
        "Created": "2024-02-25T03:40:37.181301618Z",
        "Scope": "local",
        "Driver": "bridge",
        "EnableIPv6": false,
        "IPAM": {
            "Driver": "default",
            "Options": {},
            "Config": [
                {
                    "Subnet": "172.18.0.0/16",
                    "Gateway": "172.18.0.1"
                }
            ]
        },
        "Internal": false,
        "Attachable": false,
        "Ingress": false,
        "ConfigFrom": {
            "Network": ""
        },
        "ConfigOnly": false,
        "Containers": {
            "c2974a7729c40e334abe3e37516d739652c873ae78d48a79fdaaf7fc09eedc7a": {
                "Name": "new_nginx",
                "EndpointID": "df91bd215fe1782562bfed9df2c2650c3ba67328978f5d52768bfd5537d795bd",
                "MacAddress": "02:42:ac:12:00:02",
                "IPv4Address": "172.18.0.2/16",
                "IPv6Address": ""
            }
        },
        "Options": {},
        "Labels": {}
    }
]
docker network connect
可以用connect來換container連接的network
首先docker network ls找出 my_app_net的id 0220d7072c3c
docker network ls
NETWORK ID     NAME         DRIVER    SCOPE
2313892629d2   bridge       bridge    local
d65460053270   host         host      local
0220d7072c3c   my_app_net   bridge    local
b9e00e464780   none         null      local
然後docker container ls找出 myPostgres 的 id 9d42ec29c4ec
docker container ls
CONTAINER ID   IMAGE      COMMAND                  CREATED         STATUS         PORTS                  NAMES
c2974a7729c4   nginx      "/docker-entrypoint.…"   5 minutes ago   Up 5 minutes   80/tcp                 new_nginx
9d42ec29c4ec   postgres   "docker-entrypoint.s…"   2 hours ago     Up 2 hours     5432/tcp               myPostgres
e61fd0287afe   nginx      "/docker-entrypoint.…"   2 hours ago     Up 2 hours     0.0.0.0:3000->80/tcp   myNginx
用名稱
my_app_net或myPostgre也可以
docker network connect 0220 9d42
這樣 myPostgre 就同時連到 Bridge和 my_app_net
docker container inspect myPostgres
可以看到他同時連到兩個network
            "Networks": {
                "bridge": {
                    "IPAMConfig": null,
                    "Links": null,
                    "Aliases": null,
                    "MacAddress": "02:42:ac:11:00:03",
                    "NetworkID": "2313892629d28603e811aacb93d5dc062df4f010da88a8c318b1ee47c1ed84c8",
                    "EndpointID": "5b57f51c7c73c37e155967e9c9480c41e05c06e4cf7bf1fc233613d604348d7f",
                    "Gateway": "172.17.0.1",
                    "IPAddress": "172.17.0.3",
                    "IPPrefixLen": 16,
                    "IPv6Gateway": "",
                    "GlobalIPv6Address": "",
                    "GlobalIPv6PrefixLen": 0,
                    "DriverOpts": null,
                    "DNSNames": null
                },
                "my_app_net": {
                    "IPAMConfig": {},
                    "Links": null,
                    "Aliases": [
                        "9d42ec29c4ec"
                    ],
                    "MacAddress": "02:42:ac:12:00:03",
                    "NetworkID": "0220d7072c3c4d7cdb352e473b2071efeb364bfd3736f68ea4a0be61ae70c625",
                    "EndpointID": "2af2ccd31173faec54f6875770dcf6758a15c43387d3c9a1fa5d13bb9fcce927",
                    "Gateway": "172.18.0.1",
                    "IPAddress": "172.18.0.3",
                    "IPPrefixLen": 16,
                    "IPv6Gateway": "",
                    "GlobalIPv6Address": "",
                    "GlobalIPv6PrefixLen": 0,
                    "DriverOpts": {},
                    "DNSNames": [
                        "myPostgres",
                        "9d42ec29c4ec"
                    ]
                }
docker network disconnect / docker network rm
以下指令可以disconnect container
docker network disconnect my_app_net myPostgres
docker network disconnect my_app_net new_nginx
只有沒有任何container連接的network 可以rm
docker network rm my_app_net
2-5-4 Docker Network:用 container的名稱來互相溝通
docker的container可以用ip來互相溝通,但ip常常變來變去,所以應該要使用container的名稱來互相溝通
Docker daemon 內建 DNS server 可以給container使用,因此可以呼叫名稱 Bridge不能使用DNS,因此建議盡量自建network
起兩個container在 bridge向下,使用nginx:alpine是因為這樣才能使用ping來展示
docker container run --name nginx1 -d nginx:alpine
docker container run --name nginx2 -d nginx:alpine
-20240225134231523.png)
# docker network inspect bridge
        "Containers": {
            "1107f986c1403cb131e22d533689280cd66c10b18a1e723dddb124b2adf05607": {
                "Name": "nginx2",
                "EndpointID": "57d296164152bafc69badadb1a2e94ca0070e2ac00cf937218b8f6e9aa6b0973",
                "MacAddress": "02:42:ac:11:00:03",
                "IPv4Address": "172.17.0.3/16",
                "IPv6Address": ""
            },
            "b4a518f837df9f59a8f098b922dccf938f684dd3b6ef4437b8ccb3f97d45257a": {
                "Name": "nginx1",
                "EndpointID": "b6114432159ff57c6a5afc6b0c8737fdb7ae7b7f597f541185dac77b3a47306a",
                "MacAddress": "02:42:ac:11:00:02",
                "IPv4Address": "172.17.0.2/16",
                "IPv6Address": ""
            }
        },
假如我們用nginx1去ping nginx2會發現ping不了,因為bridge network不能用DNS,如果真的要使用可以用 --link手動聯繫兩個container
docker container exec -it nginx1 ping nginx2
ping: bad address 'nginx2'
我們新創一個my_app_net,183
docker network create my_app_net
docker network disconnect bridge nginx1
docker network disconnect bridge nginx2
docker network connect my_app_net nginx1
docker network connect my_app_net nginx2
在自訂的network內就可以使用docker的DNS來ping了
docker container exec -it nginx1 ping nginx2
PING nginx2 (172.18.0.3): 56 data bytes
64 bytes from 172.18.0.3: seq=0 ttl=64 time=0.067 ms
64 bytes from 172.18.0.3: seq=1 ttl=64 time=0.094 ms
我們再新增一個network my_app_net2之後把 nginx2移動過去
docker network create my_app_net2
docker network disconnect my_app_net nginx2
docker network connect my_app_net2 nginx2
在不同的network中不能 連接
docker container exec -it nginx1 ping nginx2
ping: bad address 'nginx2'
2-5-5 DNS Round Robin Test
- 什麼是循環 DNS? 循環 DNS 是一種負載平衡技術,是指對單一網域名稱使用多個不同的 IP 位址。 Docker 的自定義network也可以使用相同的功能
循環配置 DNS 有什麼缺點?
- 並不總能提供均勻分佈的負載平衡。如果使用者向流量特別高的遞迴解析程式發出對特定網站的 DNS 查詢,則該解析程式將快取該網站的 IP,並可能會向該 IP 傳送大量流量。
- 無法以來循環配置來提供可靠性;如果其中一個伺服器故障,DNS 伺服器仍會將該伺服器的 IP 保留在循環配置的輪替中。
本次練習會使用 docker container run中下面的指令,也就是在一個network裏面,多個container 可以被同一個 alias 呼叫,這邊使用 search這個alias name
--network-alias list Add network-scoped alias for the container
我們先create 一個 networktestNet
docker network create testNet
接著起兩個 elasticsearch:7.5.2,記得下面的name要更改,然後設定成可以用 search來訪問 (--network-alias search 指令)
docker container run -d --name elasticsearch1 --network testNet -e "discovery.type=single-node" --network-alias search elasticsearch:7.5.2
看一下elasticsearch1, elasticsearch2登記在哪兩個ip
docker network inspect testNet
以下是登記位置
elasticsearch1:172.20.0.2elasticsearch2:172.20.0.3
        "Containers": {
            "069fdc092cb388813f8d51239624defd874e31a45eb0504114dd650792563b01": {
                "Name": "elasticsearch2",
                "EndpointID": "525e21a4d1fae2690cd507b06eac8a55fdce722c1d307a6727012be8f332415e",
                "MacAddress": "02:42:ac:14:00:03",
                "IPv4Address": "172.20.0.3/16",
                "IPv6Address": ""
            },
            "88c7c6e972e8103fcd9d6aadfaa71dbb1eaaf5e40429200e41d70ccf9c418493": {
                "Name": "elasticsearch1",
                "EndpointID": "31e5530766e8979c5eaacfdb674ef4bad4ae8aa256f0a47d416d3ae47f9b7b07",
                "MacAddress": "02:42:ac:14:00:02",
                "IPv4Address": "172.20.0.2/16",
                "IPv6Address": ""
            }
        },
接著我們可以用 aline linux發射 nslookup (--rm是指發射玩這個指令alpine就會被刪掉)
nslookup(意為name server lookup) 查詢域名的ip地址以及ip地址所對應的域名
docker container run --rm --network testNet alpine nslookup search
可以看到search有對到兩個ip
Server:		127.0.0.11
Address:	127.0.0.11:53

Non-authoritative answer:

Non-authoritative answer:
Name:	search
Address: 172.20.0.3
Name:	search
Address: 172.20.0.2
起一個alpine立刻進入sh, 我們要使用 ping search -c 3指令來連連看search
docker container run -it --name alpine --network testNet alpine sh
ping search -c 3
如果多ping個幾次,可以發現有的時候會ping到 elasticsearch1 有時會ping到 elasticsearch2
/ # ping search -c 3
PING search (172.20.0.3): 56 data bytes
64 bytes from 172.20.0.3: seq=0 ttl=64 time=0.144 ms
64 bytes from 172.20.0.3: seq=1 ttl=64 time=0.151 ms
64 bytes from 172.20.0.3: seq=2 ttl=64 time=0.156 ms

--- search ping statistics ---
3 packets transmitted, 3 packets received, 0% packet loss
round-trip min/avg/max = 0.144/0.150/0.156 ms
/ # ping search -c 3
PING search (172.20.0.2): 56 data bytes
64 bytes from 172.20.0.2: seq=0 ttl=64 time=0.155 ms
64 bytes from 172.20.0.2: seq=1 ttl=64 time=0.154 ms
64 bytes from 172.20.0.2: seq=2 ttl=64 time=0.149 ms
3. Build Image By docker file
我們可以用 Dockerfile來自創一個新的image,以下是Dockerfile中常見的指令
| 指令 | 內容 |
|---|---|
FROM |
指定原始image,要從哪個Image往上build |
ADD |
把檔案、資料夾加到image |
COPY |
把檔案、資料夾複製到image |
RUN |
建立image要跑得指令 |
CMD |
指定啟動Container時要跑得指令 |
ENTRYPOINT |
強行要求執行image時的指令 |
ONBUILD |
建立完成時執行的指令 |
EXPOSE |
向image使用者傳達設定的PORT |
VOLUMN |
將Image內部檔案從宿主端掛載進去做長期儲存 |
ENV |
定義環境變數 |
WORKDIR |
指定RUN、CMD、ENTRYPOINT、ADD、COPY時的工作目錄 |
SHELL |
指定建立時的Shell |
LABEL |
設定名稱、版本號、製作者資訊 |
USER |
設定RUN、CMD、ENTRYPOINT等指令的使用者、群組 |
ARG |
宣告在使用docker build指令的時候可以指定的參數 |
STOPSIGNAL |
變更執行docker stop時,傳送給container的程式的訊號 |
HEALTHCHECK |
自行確認container存活情況的檢測項目 |
3-1: [練習]Build 一個 容量只有 1.3 mb 的 nginx
下面有一個 從 alpine build nginx,再將nginx binary code 複製到 scratch 的簡單 Dockerfile,目的在於容量最小化, 並於後面詳細解釋。
這個image 需要搭配 docker-compose.yml 一起使用,因為在驗證下載的正確性時,key server keyserver.ubuntu.com 用 DNS 8.8.8.8 才能抵達。
# Ref: https://github.com/gunjank/docker-nginx-scratch/blob/master/Dockerfile
# Ref: https://www.cnblogs.com/yshyee/p/6525401.html
# 這邊alpine會使用Multi-stage builds
# 透過 Multi-Stage Builds 改善持續交付流程 https://tachingchen.com/tw/blog/docker-multi-stage-builds/
FROM alpine:latest as nginx-builder

# 設定要下載的nginx version
ARG NGINX_VERSION=1.25.4

# 安裝build tools https://www.cnblogs.com/dogecheng/p/11437413.html
# --no-cache: 和安裝完軟體後使用rm -rf /var/cache/apk/一樣功能,把安裝包刪掉
# --virtual 是用名稱".build-deps" 來做出一個虛擬的包,把安裝的東西放在裡面,工具包就不會跑到world,之後方便刪除 https://blog.csdn.net/qq_34018840/article/details/94430584

# build-base: Meta package for build base???
# gnupg: 密碼學軟體,用於加密、簽章
# pcre-dev: 相容於Perl的正規表示式 (Perl Compatible Regular Expressions) 函式庫
# wget: 下載工具
# zlib-dev: 壓縮/解壓縮
RUN apk add --update --no-cache --virtual .build-deps\
  build-base \
  gnupg \
  pcre-dev \
  wget \
  zlib-dev


# alpine 會找不到zlib 安裝包,要手動告知安裝位置
ENV LIBRARY_PATH=/lib:/usr/lib

RUN wget http://zlib.net/zlib-1.3.1.tar.gz && \
  tar -zxf zlib-1.3.1.tar.gz
RUN ./zlib-1.3.1/configure --prefix=/usr/local/zlib && make && make install

# set -x 讓過程都可以print出來
# set -e 如果有任何指令失敗,則立即退出
# 可以合著用 set -ex
# 先從key Server下載nginx 的私鑰
# --keyserver 之後指定的是密鑰伺服器的地址。
# --recv-keys 要導入的公鑰的指紋
# 然後下載nginx 的 source code.tar.gz與公鑰 tar.gz.asc (wget -q 不顯示下載過程)
# 再用gpg 去verify tar.gz的真偽
# 最後解壓縮tar.gz
#http://nginx.org/download/nginx-1.25.4.tar.gz

RUN set -ex                                                                     && \
  cd /tmp                                                                       && \
  gpg --keyserver keyserver.ubuntu.com                                        \
  --recv-keys D6786CE303D9A9022998DC6CC8464D549AF75C0A                          && \
  wget -q http://nginx.org/download/nginx-${NGINX_VERSION}.tar.gz               && \
  wget -q http://nginx.org/download/nginx-${NGINX_VERSION}.tar.gz.asc           && \
  gpg --verify nginx-${NGINX_VERSION}.tar.gz.asc nginx-${NGINX_VERSION}.tar.gz  && \
  tar -xf nginx-${NGINX_VERSION}.tar.gz                                         && \
  echo ${NGINX_VERSION} "Download and verify successful"


# 會先在tmp裡面從alpine build nginx 之後再把binary copy到scratch
WORKDIR /tmp/nginx-${NGINX_VERSION}


# 直接從nginx source code build起來
# http://nginx.org/en/docs/configure.html
# --with-ld-opt=parameters => sets additional parameters that will be used during linking.
# make install 之後會裝在/usr/local/nginx
# strip /usr/local/nginx/sbin/nginx => 是一個減肥指令,讓nginx/sbin/nginx 這個檔案變小,但不影響功能
RUN find -name 'libz.'
RUN ./configure \
  --with-zlib=/zlib-1.3.1 \
  --with-ld-opt="-static" \
  --with-http_sub_module &&\
  make install &&\
  strip /usr/local/nginx/sbin/nginx


# nginx 的成功與錯誤資訊都綁到docker預設的 docker log collector
# 只要連到/dev/stdout 和 /dev/stderr 就可以docker log裡直接看到nginx的log
# 因為我們是裝在 /usr/local所以資料夾和nginx 官網的docker file 使用的var路徑 不一樣
RUN ln -sf /dev/stdout /usr/local/nginx/access.log  && \
  ln -sf /dev/stderr /usr/local/nginx/error.log

# 接著是multi-stage的第二個stage
# 從scratch開始,把剛剛build好的nginx binary copy到scratch
FROM scratch

# Customise static content, and configuration
# copy 同時有很多檔案路徑時,意思式把前面的全部都複製到最後一個
# /etc/passwd: information for all user accounts
COPY --from=nginx-builder /etc/passwd /etc/group /etc/
COPY --from=nginx-builder /usr/local/nginx /usr/local/nginx
# COPY --from=nginx-builder /usr/local/nginx/html/ /usr/share/nginx/html/
# COPY --from=nginx-builder /usr/local/nginx/conf/ /usr/local/nginx/conf/

# 把本地的檔案複製到容器中
#COPY index.html /usr/share/nginx/html/
#COPY nginx.conf /usr/local/nginx/conf/

#Change default stop signal from SIGTERM to SIGQUIT
# 當按下ctrl-c 的時候會呼叫 STOPSIGNAL,但預設是SIGTERM,這邊改成SIGQUIT,會直接關掉
STOPSIGNAL SIGQUIT

EXPOSE 80

# 了解 CMD 與 ENTRYPOINT
# https://ithelp.ithome.com.tw/articles/10250988

# Entrypoint 可以疊在cmd 前面執行
ENTRYPOINT ["/usr/local/nginx/sbin/nginx"]
CMD ["-g", "daemon off;"]
用來啟動他的yml
version: "3.8"
services:
  nginx:
    build:
      context: .
      dockerfile: Dockerfile
    ports:
      - "3000:80"
    volumes:
      - ./nginx.conf:/etc/nginx/nginx.conf
    dns:
      - 8.8.8.8
      - 1.1.1.1
路徑如下
/
|_Dockerfile
|_docker-compose.yml
3-2 解說如下
首先先需要用 FROM 從某個基礎的image 往上 build, 這裡選擇體積很小的 alpine Linux 作為base。並幫他取一個名稱 nginx-builder,這是因為 接著要使用多階段構建 (multi-stage builds)的功能,會使用到別的base來做區別。
如果要完全從頭開始的話可以用 FROM scratch
ARG NGINX_VERSION=1.25.4 則是設定變數 NGINX_VERSION代表1.25.4,之後都寫NGINX_VERSION就好。
FROM alpine:latest as nginx-builder
# 設定要下載的nginx version
ARG NGINX_VERSION=1.25.4
接著安裝build nginx 時需要用的輔助套件,但 zlib-dev安裝後仍然需要從官網重新下載 。
我使用--virtual .build-deps創建虛擬環境来簡化後續的清理工作。安装的dependency包括:
build-base:Compile工具包(如gcc和make)。gnupg:用於驗證下載的內容是否有誤。pcre-dev:支持Perl regex。wget:用於下載文件。zlib-dev:提供解壓縮功能。
RUN apk add --update --no-cache --virtual .build-deps\
  build-base \
  gnupg \
  pcre-dev \
  wget \
  zlib-dev
以下幾行是解決alpine找不到zlib-dev的問題
- 先使用
ENV設定 環境變數LIBRARY_PATH RUN wget下載zlib的原始檔案,並用tar解壓縮RUN make && make install將原始碼build成 binary之後安裝
ENV LIBRARY_PATH=/lib:/usr/lib

RUN wget http://zlib.net/zlib-1.3.1.tar.gz && \
  tar -zxf zlib-1.3.1.tar.gz
RUN ./zlib-1.3.1/configure --prefix=/usr/local/zlib && make && make install
以下程式碼功能如下
- set -ex 讓過程都可以print出來,如果有任何指令失敗,則立即退出
cd /tmp:nginx 等等要下載在/tmp裡gpg --keyserver xxx --recv-keys的功能是先獲得 等一下要下載的nginx-1.25.4.tar.gz的公鑰,如何找到公鑰的指紋的方法請詳見 5. 如何獲得公鑰- 接著
wget下載 nginx 本體的tar.gz與公鑰tar.gz.asc gpg --verify用公私鑰驗證下載的完整性,確保nginx 下載的內容物是正確的tar解壓縮 nginx
RUN set -ex                                                                     && \
  cd /tmp                                                                       && \
  gpg --keyserver keyserver.ubuntu.com                                        \
  --recv-keys D6786CE303D9A9022998DC6CC8464D549AF75C0A                          && \
  wget -q http://nginx.org/download/nginx-${NGINX_VERSION}.tar.gz               && \
  wget -q http://nginx.org/download/nginx-${NGINX_VERSION}.tar.gz.asc           && \
  gpg --verify nginx-${NGINX_VERSION}.tar.gz.asc nginx-${NGINX_VERSION}.tar.gz  && \
  tar -xf nginx-${NGINX_VERSION}.tar.gz                                         && \
  echo ${NGINX_VERSION} "Download and verify successful"
接下來要把 nginx 直接從 原始碼變成 binary code
RUN find -name 'libz.':這個指令也是因為zlib找不到,所以要先RUN find -name 'libz.'才找的到RUN ./configure:跑nginx 內部預設的 config來安裝 (Parameter 請看Building nginx from Sources)--with-zlib: 告訴nginx 在安裝時要去哪裡找到zlib真正的位置--with-ld-opt: sets additional parameters that will be used during linking.--with-http_sub_module: enables building the ngx_http_sub_module module
- make install: compile nginx
- strip: 可以讓binary code 容量變小
# 直接從nginx source code build起來
# http://nginx.org/en/docs/configure.html
# --with-ld-opt=parameters => sets additional parameters that will be used during linking.
# make install 之後會裝在/usr/local/nginx
# strip /usr/local/nginx/sbin/nginx => 是一個減肥指令,讓nginx/sbin/nginx 這個檔案變小,但不影響功能
RUN find -name 'libz.*'
RUN ./configure \
  --with-zlib=/zlib-1.3.1 \
  --with-ld-opt="-static" \
  --with-http_sub_module &&\
  make install &&\
  strip /usr/local/nginx/sbin/nginx
以下兩行是把nginx 裡面會出錯的訊息連接到 docker 預設的 log output資料夾,可以在使用docker Desktop的時候直接點開container看裡面的訊息,不需要自己另外存放log。
但由於下面使用scratch當作新的基底,這邊的log其實並不能再啟動後呈現,因為scratch沒有/bash可以使用 ln
RUN ln -sf /dev/stdout /usr/local/nginx/access.log  && \
  ln -sf /dev/stderr /usr/local/nginx/error.log
FROM scratch新增一個空殼,我們可以把alpine中compile好的 nginx binary 檔案複製進來,這樣最終的image就只會剩下 nginx binary code. 讓容量變的很小。
FROM scratch

COPY --from=nginx-builder /etc/passwd /etc/group /etc/
COPY --from=nginx-builder /usr/local/nginx /usr/local/nginx
接著用 SIGQUIT 取代預設的 STOPSIGNAL : SIGTERM,STOPSIGNAL是在nginx 停止時的方案,SIGQUIT 相較於SIGTERM 會在停止nginx時把相關資料寫道log裡面。
EXPOSE 80 暴露 http port 給外界使用,也可以加上 443 開放 https port
STOPSIGNAL SIGQUIT

EXPOSE 80
Entrypoint給定Nginx 執行路徑,CMD 設定nginx container 啟動時會呼叫的指令,-g代表設定全局設定,daemon off;強迫nginx在前台運行
ENTRYPOINT ["/usr/local/nginx/sbin/nginx"]
CMD ["-g", "daemon off;"]
5. 如何獲得公鑰
備註:獲取驗證碼
curl http://nginx.org/download/nginx-1.25.4.tar.gz --output ./nginx-1.25.4.tar.gz
下載公鑰
curl http://nginx.org/download/nginx-1.25.4.tar.gz.asc --output ./nginx-1.25.4.tar.gz.asc
使用 gpg verify的時候就會發現 沒有私鑰,它會說要去哪裡recieve私鑰,接著就要去key Server找私鑰
gpg --verify nginx-1.25.4.tar.gz.asc nginx-1.25.4.tar.gz
gpg: Signature made 2024年02月15日 (週四) 00時04分59秒 CST
gpg:                using RSA key D6786CE303D9A9022998DC6CC8464D549AF75C0A
gpg:                issuer "[email protected]"
要從某個keyServer找到key,我發現 ubuntu 的server有
gpg --keyserver keyserver.ubuntu.com --recv-keys D6786CE303D9A9022998DC6CC8464D549AF75C0A
> gpg: key C8464D549AF75C0A: public key "Sergey Kandaurov <[email protected]>" imported
gpg: Total number processed: 1
gpg:               imported: 1
gpg --verify nginx-1.25.4.tar.gz.asc nginx-1.25.4.tar.gz
接著就可以verify了
>
gpg: Signature made 2024年02月15日 (週四) 00時04分59秒 CST
gpg:                using RSA key D6786CE303D9A9022998DC6CC8464D549AF75C0A
gpg:                issuer "[email protected]"
gpg: Good signature from "Sergey Kandaurov <[email protected]>" [unknown]
gpg:                 aka "Sergey Kandaurov <[email protected]>" [unknown]
gpg: WARNING: This key is not certified with a trusted signature!
gpg:          There is no indication that the signature belongs to the owner.
Primary key fingerprint: D678 6CE3 03D9 A902 2998  DC6C C846 4D54 9AF7 5C0A